Description
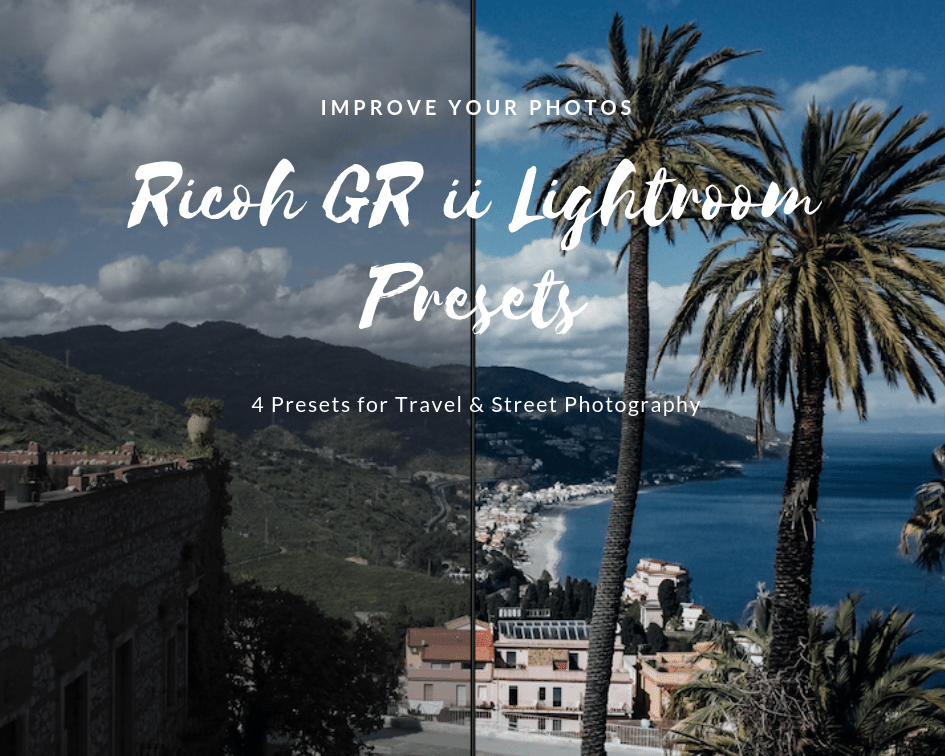
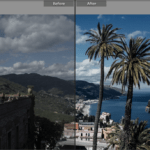
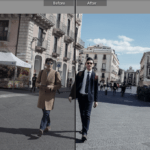
The Ricoh GR ii Lightroom Presets 1 consists of four presets. Most of the presets come with the exposure adjusted. You should, however, adjust the Exposure slider to match your style. Below, you can also find my camera settings that work best with the presets. I use the presets for both landscape and street photography with the Ricoh GR ii. So, the presets are:
- Zurich. I use this Lightroom Preset with my Ricoh GR ii most of the time. I apply it whenever there is adequate light but not a very harsh one. In other words, if I’m taking photos early in the morning or late in the afternoon, this is my to-go preset. Apart from that, I also use it when there is natural light, i.e., on a cloudy day or indoor shoots with natural light. From the photos that you see on this website, 80% of them are shot with this preset with minor adjustments.
- Syracuse. I created this preset a few months ago when I was traveling around Sicily. The light was harsh, though; therefore, I needed a preset to add some extra contrast. While the colors might remind you of Zurich, the truth is that this is a more dynamic preset. I find it ideal if you have to shoot with harsh light (for example, summertime, at noon, etc.).
- Palma. This is a more special Preset. I started using it in Palma de Mallorca. Palma is a paradise of shadows and light; therefore, this Lightroom Preset comes in handy for very high-contrasts and slightly over-saturated photos. This preset will practically hide all the dark areas of the photos and add color and light to the rest of the image. A fine option for minimal photos, too. You might have to adjust the Saturation slider depending on the colors and the intensity of the light.
- Tromso. I won’t lie: I like taking photos at night. But this means that a) the Ricoh has to struggle due to low light and b) there is, of course, no natural light. Although I usually don’t recommend the Ricoh GR ii for low light photos, I have developed a preset that helps me shoot decent photos at night and in interiors where the natural light is absent.
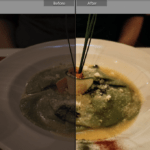
Click on the photos to see the before & after of each Preset.
Optimal use and settings
I would also like to share with you my Ricoh GR ii settings. Applying these settings to your Ricoh GR ii camera will help you make the most out of my Ricoh GR ii Lightroom Presets. So here’s what I use: Contrast 2, Saturation 1, Sharpness 5, Vignetting Off. These settings result in a more flat image that can be later altered in post-processing.
If you want to create this (let’s call it) Picture Profile, then you do the following: Turn on the camera, hit Menu, and in the Shooting area, you go to Image settings. I used Setting 2, and there I added the above-mentioned settings. As for the rest of the Shooting Menu settings, the Effects are Off, Ambient Brightness is set to Normal and White Balance at Multi-P Auto. Most of the time, I keep the custom ND Filter On.
Depending on the scene, I sometimes underexpose by -0,3 or -0,7 at the most (usually when I want to capture strong shadows). Otherwise, I usually expose normally. Although some presets already have their exposure slider set, you should always adjust it according to your taste.
For night shots, I usually underexpose a bit. The reason is that I don’t want to go beyond ISO 1600 -it will be too grainy. Underexposing gives me also the chance to gain a bit of Shutter Speed too (I usually don’t have a tripod with me at night). For example, the Tromso Preset photo is shot with ISO 1600 and a Shutter Speed of 1/15. If I were about to expose properly, I would have to shoot at 1/4, which will result in a shaky photo (unless if it was not handheld).
I used to shoot JPEG+RAW (well, DNG in the Ricoh terminology), but last year I switched entirely to JPEG. This saves me disk space, and I also don’t have to buy all the time SD cards. Plus, I find the Ricoh JPEGs absolutely fine, and I have used them in printed books and magazines. That being said, the presets are optimized for shooting in JPEG. If you are mainly working with DNGs, then you should play a bit around with the Saturation and Vibrance sliders.
Last but not least, these presets are grain-free. Although I’m a big fan of grain in analog photography, the truth is that I find the digital (or should I say digitalized?) grain too artificial. Hence, if you are a fan of the digital grain, you have to adjust it according to your taste.
In which cameras these presets work
I have created and used the presets exclusively with the Ricoh GR ii. The presets work fine with the Ricoh GR too. I haven’t used them so far with the Ricoh GR iii, so if you buy this bundle for that new camera, let me know what you think. If you do buy them for another camera, please let me know how they performed; I suspect that you should correct the Saturation slider for sure and the exposure.
Lightroom Versions
I use the Ricoh GR ii Lightroom Presets 1 on Lightroom 6, and they work perfectly fine. I can’t think why they won’t work with other versions of Lightroom. I’ve never used them on Lightroom Mobile, so buy them at your own risk.
The presets are in .lrtemplate and not in .xmp. Therefore, you should unzip the file after downloading it. See below for more info on how to install the Lightroom presets.
More info about the Ricoh GR ii
A few months ago, I wrote an extensive review/presentation/ode for the Ricoh GR ii that made it on the first page of Google Search. You can read it and see more photos shot with the Ricoh GR ii here.
How to download the presets
After finalizing your purchase, you will see the “Order Completed” page. From there, you will have the option to download the Lightroom Presets you just bought. You can also download the Presets from the e-mail that you will receive. Make sure to check your spam folder (or Promotions folder, etc.) for the e-mail if you don’t see it in your Inbox. In the e-mail, you will also find the Invoice for your purchase.
How to import the Ricoh GR ii Lightroom Presets on PC or Mac
Please follow these instructions in order to import the Ricoh GR ii Lightroom Presets. After downloading the file that comes with the e-mail, you should unzip the file. After unzipping it, place the “LTB Folder” in a location that you can easily find (for example, in your Downloads folder). Then do the following (apart from Step 1, the process is the same for both Windows and Mac) :
- On a Windows PC, open Lightroom and click on Edit at the top; then click on Preferences. On a Mac, click the Lightroom tab and then click on Preferences.
- You will now see a bunch of tabs. Please, choose Presets.
- Then, click on Show Lightroom Presets Folder. Make sure that the “Store Presets in this catalog” is not checked.
- Search for the Lightroom folder and double click on it.
- Copy and paste the unzipped folder (containing the Lightroom presets you just bought) inside the Develop Presets folder. Don’t place it inside a folder that already exists.
- Close Lightroom.
- Open Lightroom. Scroll down to the Presets area, and you will see the Folder “LTB Presets.” There you will see the presets that you just bought 🙂
**Show me your photos on Instagram! Follow me on Instagram at @exil_et_royaume and add the hashtag #LTBpresets when you use my Lightroom Presets.
Due to the nature of digital products, the presets are non-refundable, and all sales are final.
